
Have you ever wondered what your hometown looks like from space, right now? Or maybe you’ve seen one of those mesmerizing satellite timelapses online and thought, “How do people make those?”
The good news is, you don’t need expensive software or a science degree. You can capture real satellite images of anywhere on Earth, for free, and it can be done in just a minute! Let’s walk through it together in 4 simple steps.
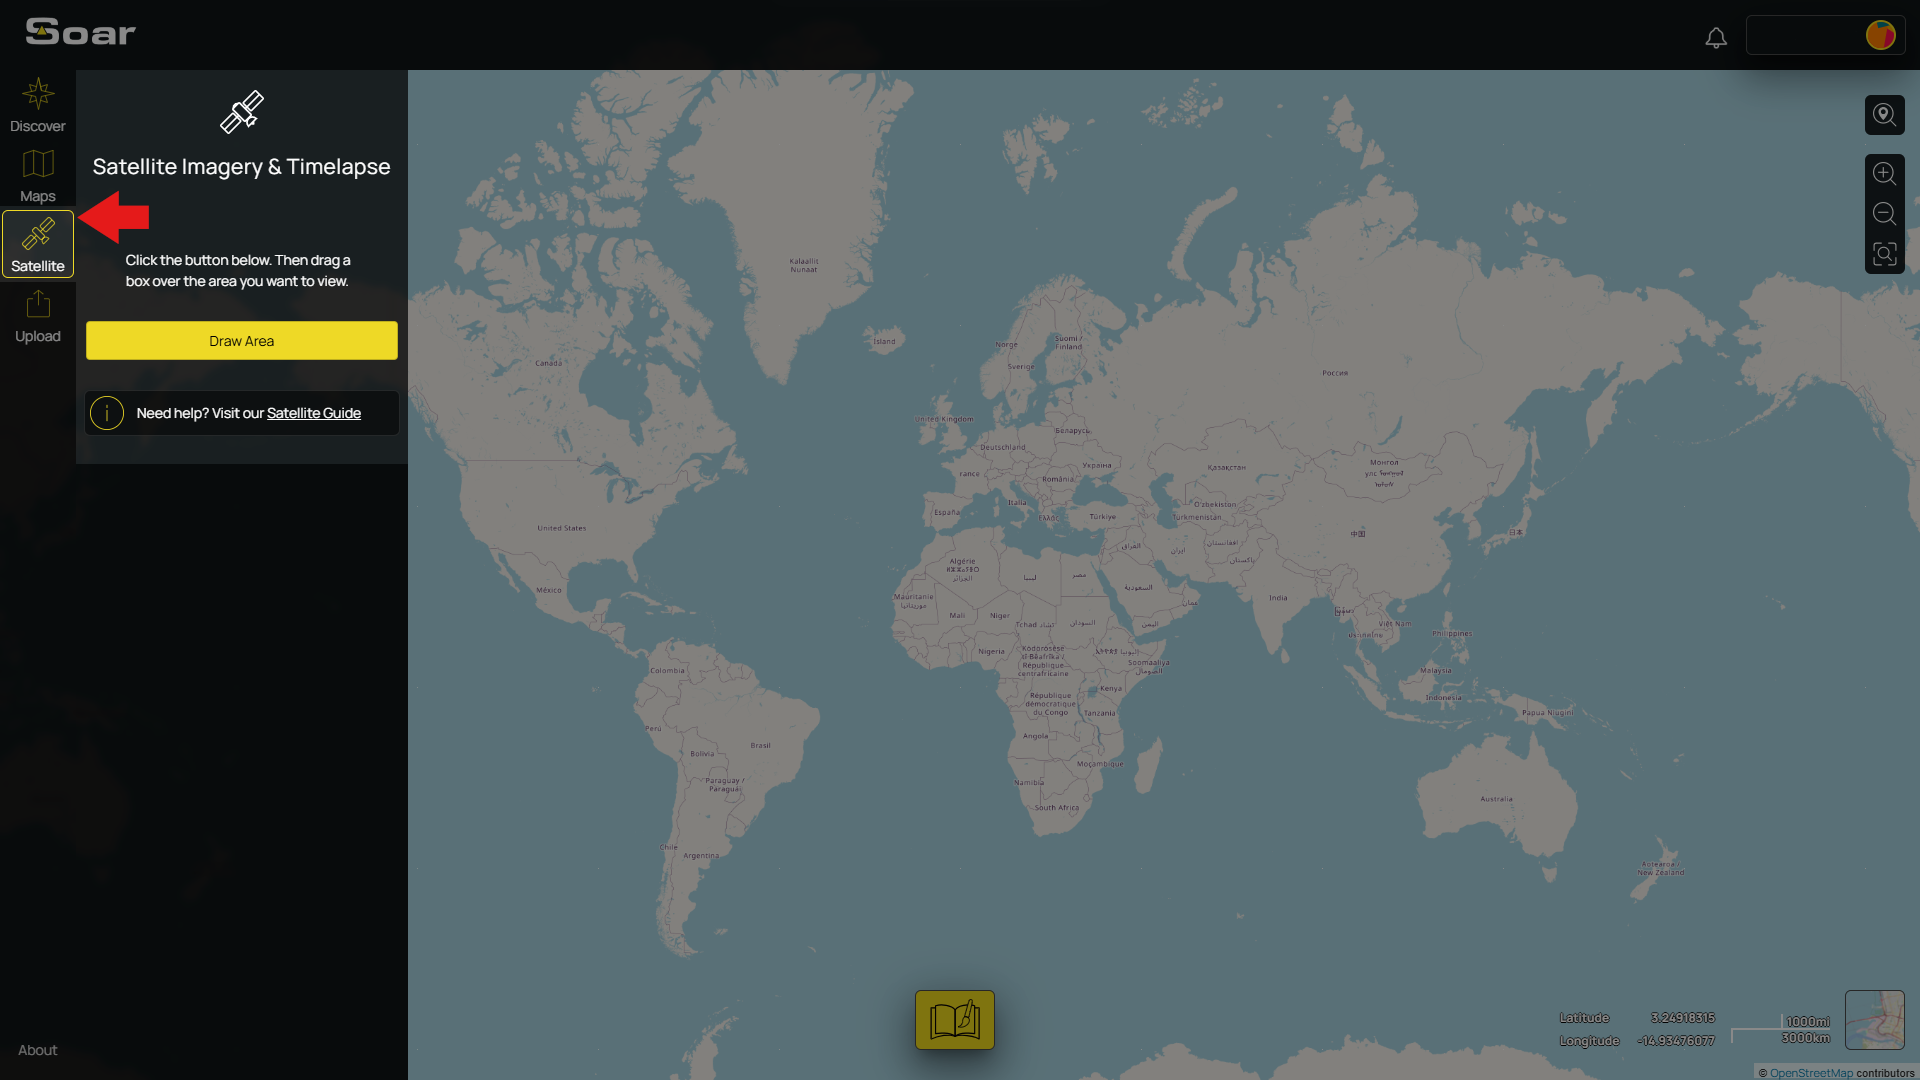
Luckily, we can use Soar Atlas to instantly capture free satellite imagery. Start by visiting soaratlas.com/satellites or clicking the “Satellite” tab on Soar’s homepage.
If you already know what you want to capture, use the Search bar near the top right of the screen. Just click the icon to pop it open and type your location.
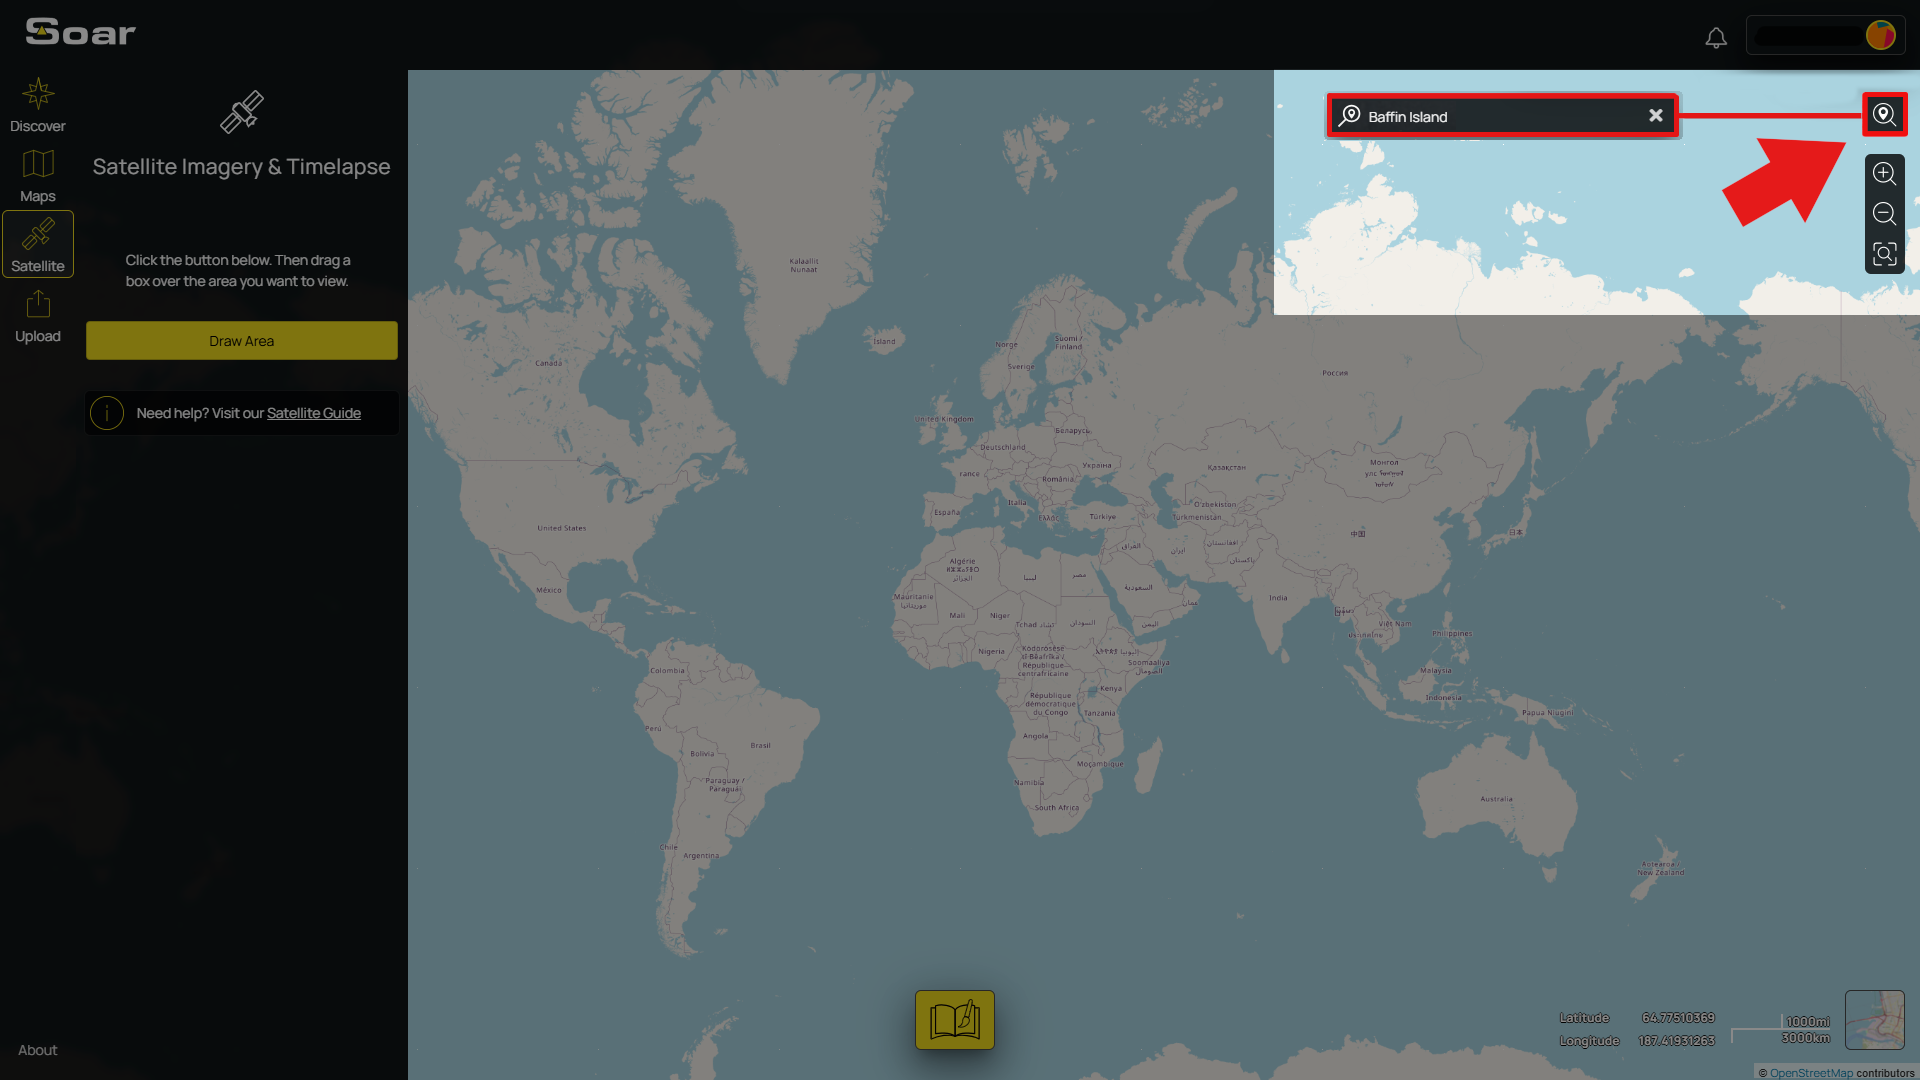
Otherwise, you can simply pan and zoom around the map until you find a place that catches your eye. Scroll with your mouse wheel to zoom in closer and click and drag to move around. Each capture can cover up to about 50 kilometers, so make sure you're zoomed in enough to your area.
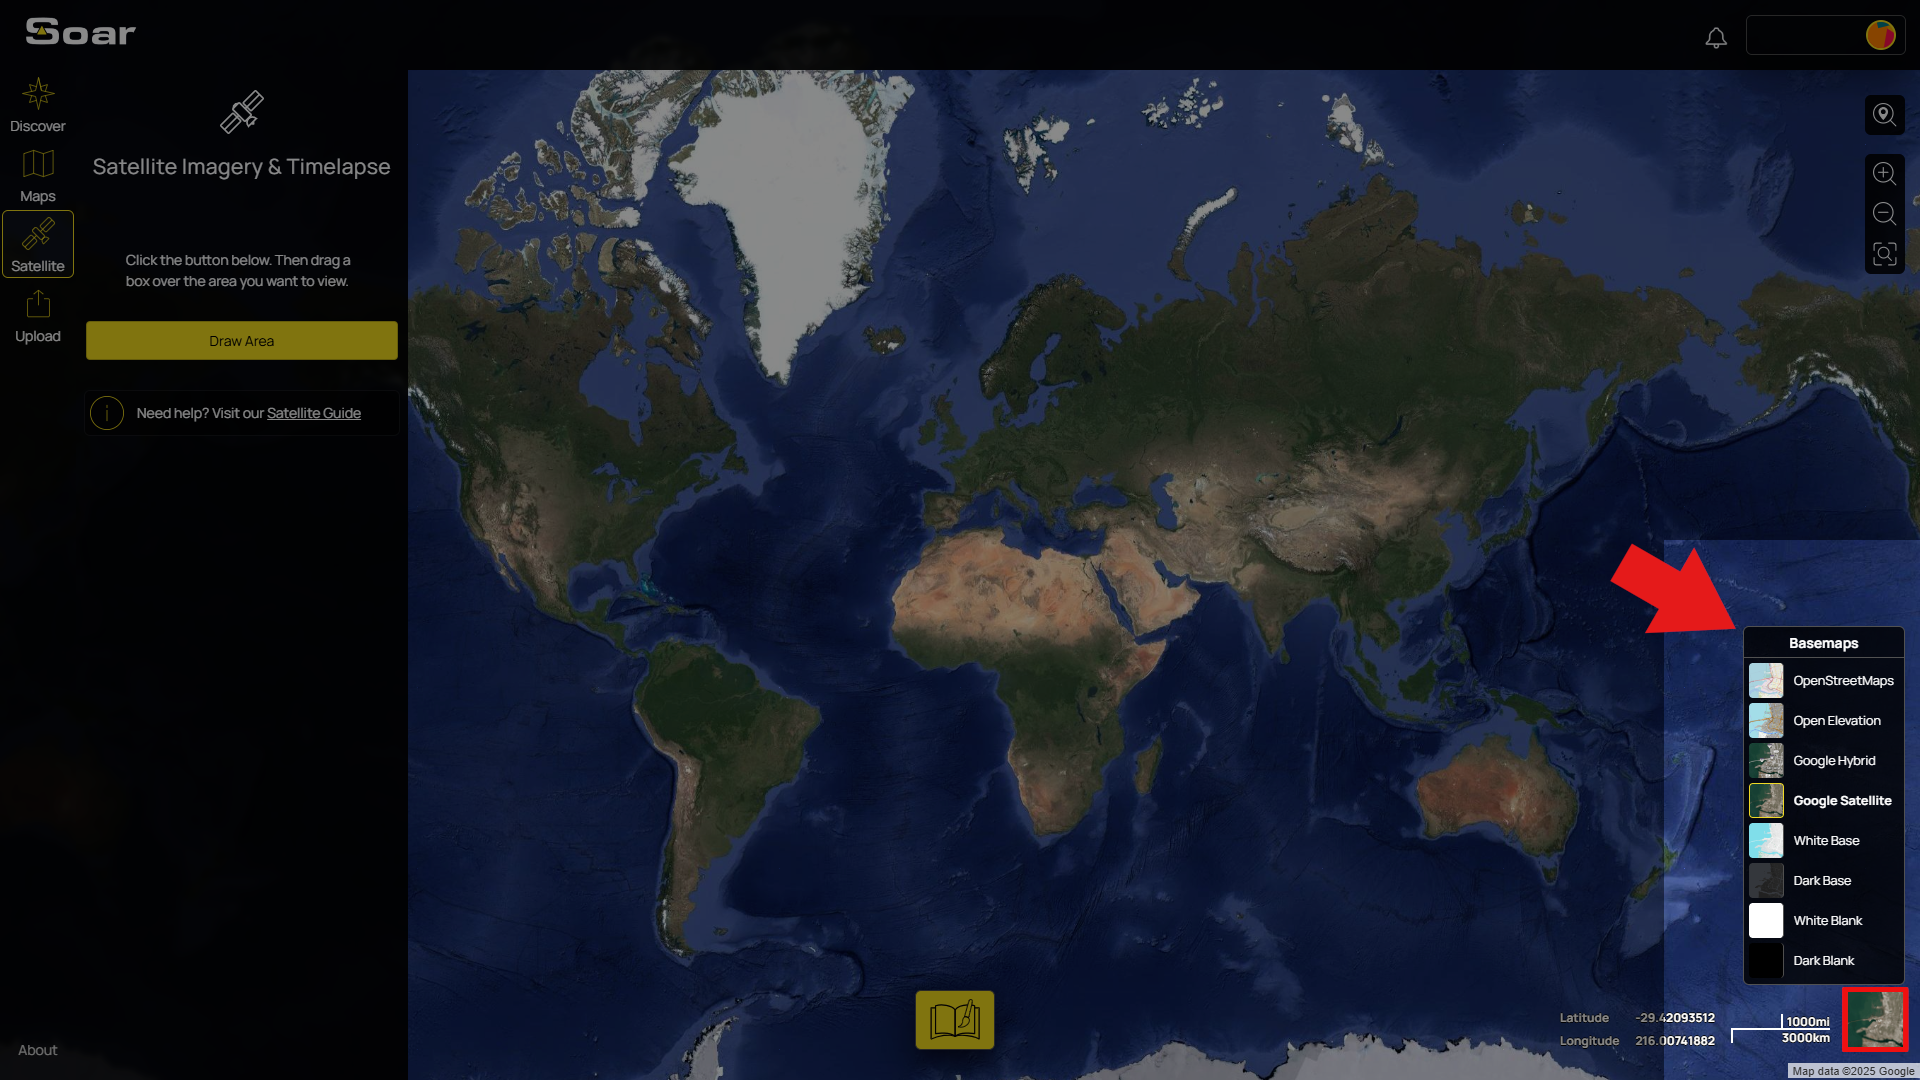
💡 Tip: You can change the basemap anytime at the bottom right corner. The basemap acts as a reference behind your satellite capture, so you know where you are on Earth. By default it's set to OpenStreetMap which only shows lables and outlines of areas. If you want something more, switch to satellite view for a clearer reference of landmarks and terrain. Keep in mind, the satellite basemap is just a reference - it’s made from older satellite images stitched together. Your capture, however, will show fresh, up-to-date imagery of your area.
Now for the fun part!
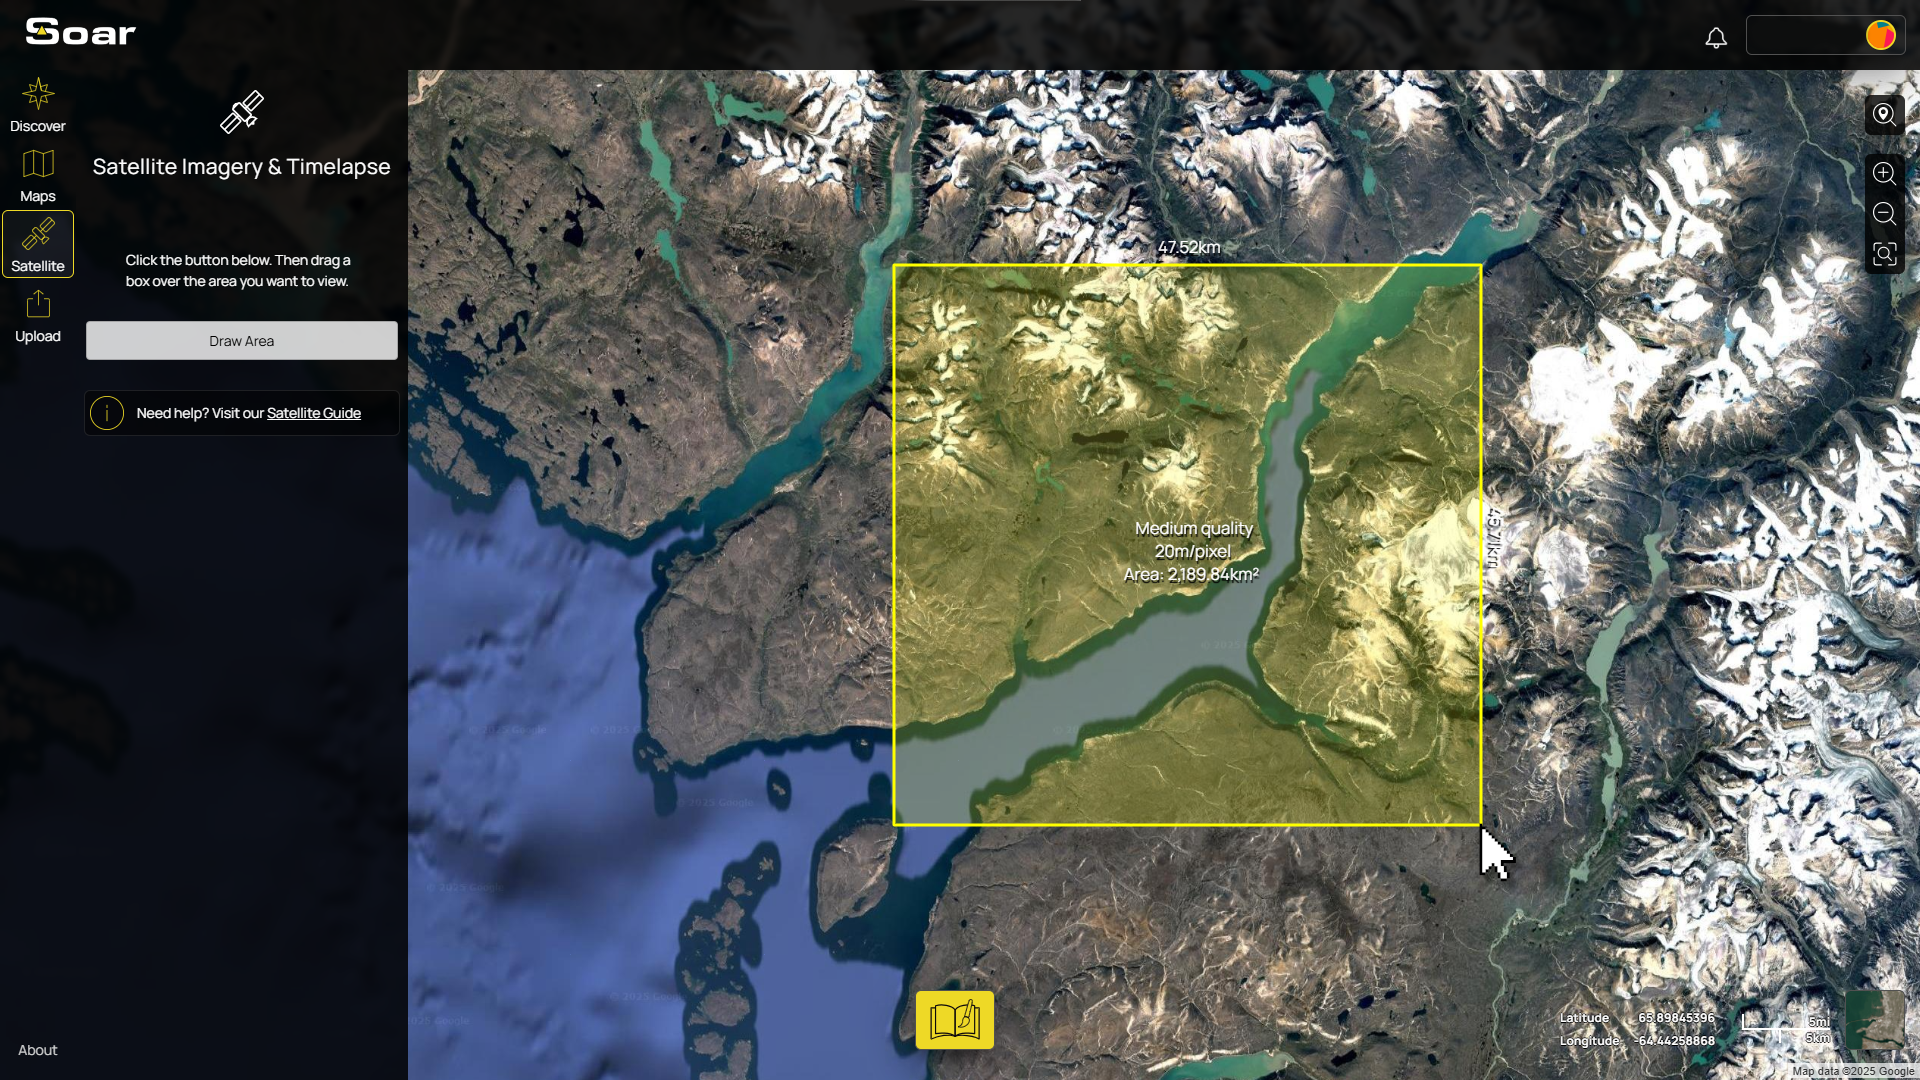
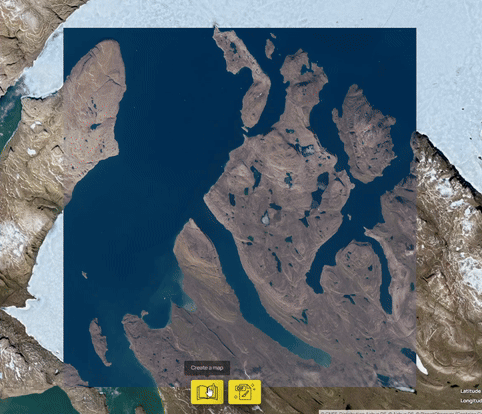
Click “Draw Area” and drag a box over the area you want to capture. You can adjust the size by dragging the corners until it feels just right. As you draw, you’ll see text showing the expected image quality and area coverage, that’s your guide to getting the clearest result. You can see here, we have Medium quality at 20 meters per pixel.
💡 Tip: If you want to start over, simply click the Satellite tab again to begin fresh.
On mobile, the process is nearly the same. Just zoom into your area and tap the button instead of drawing a box.
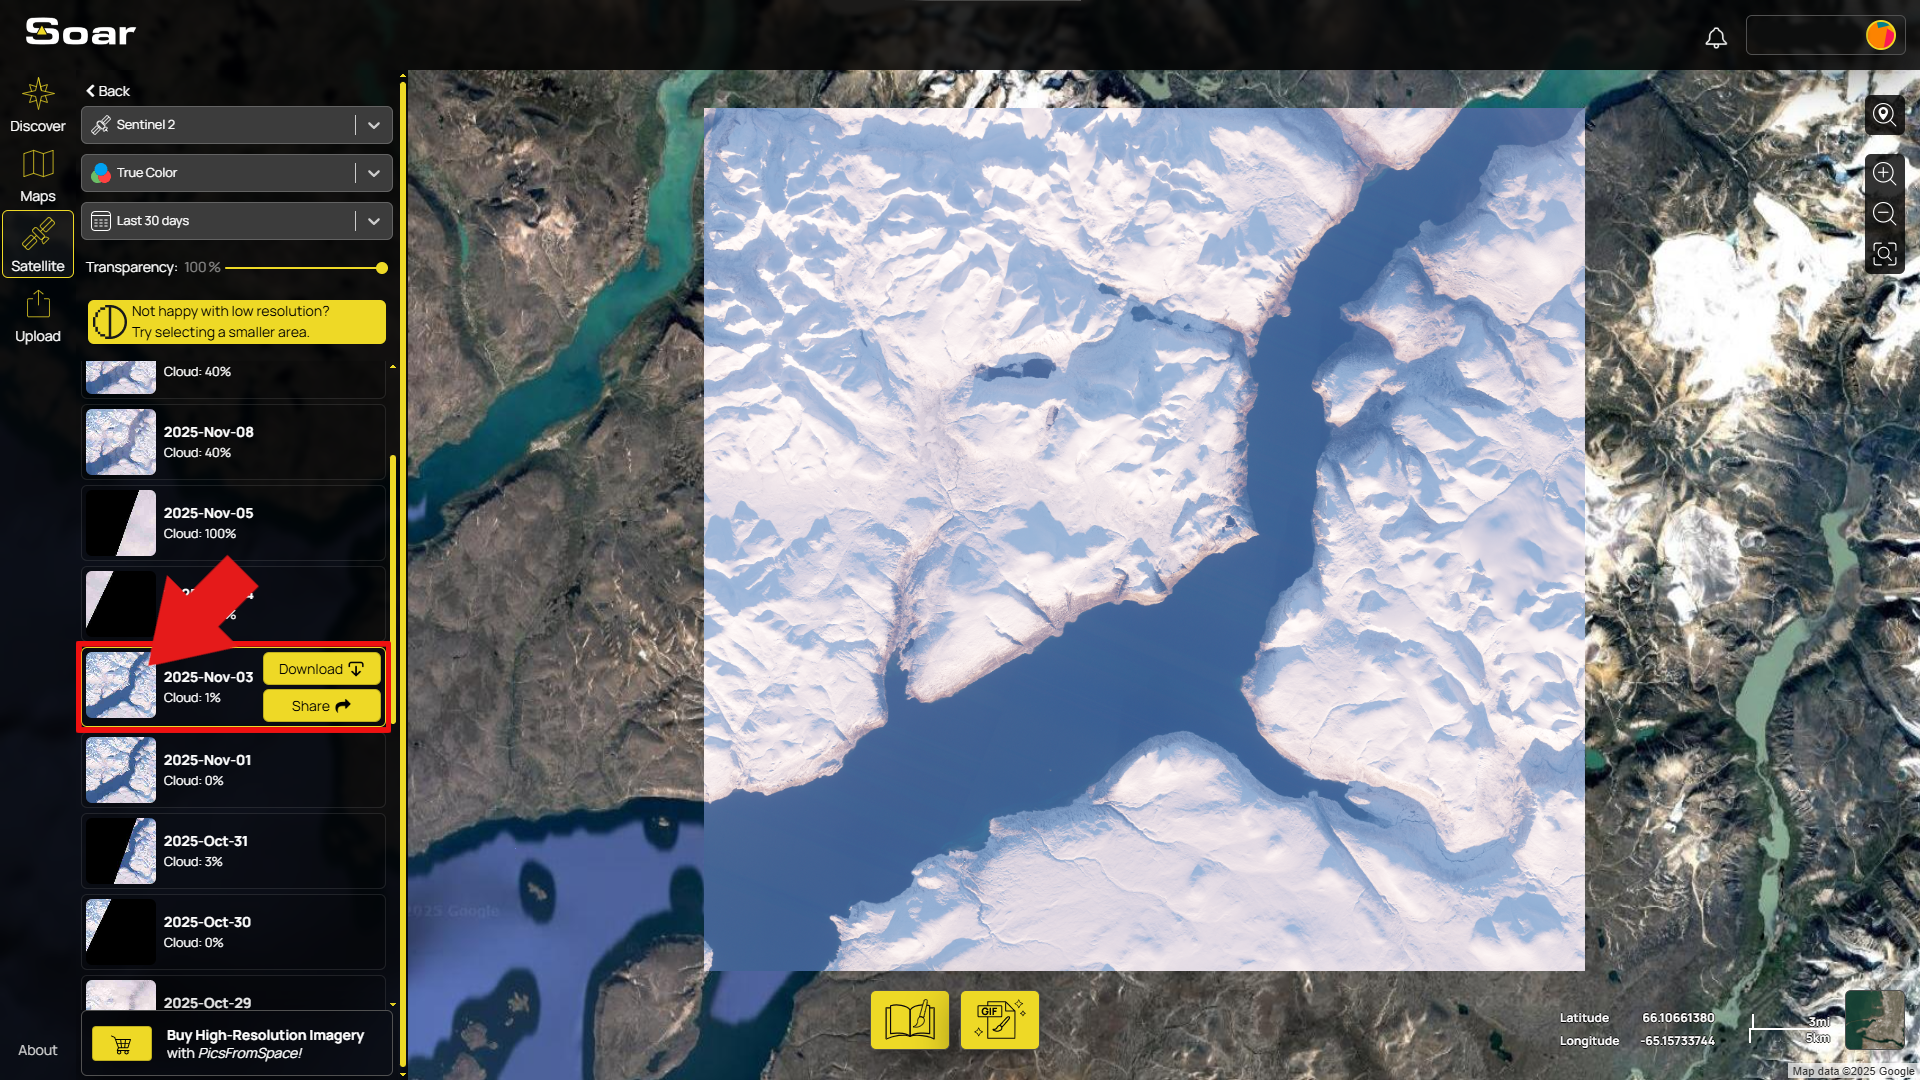
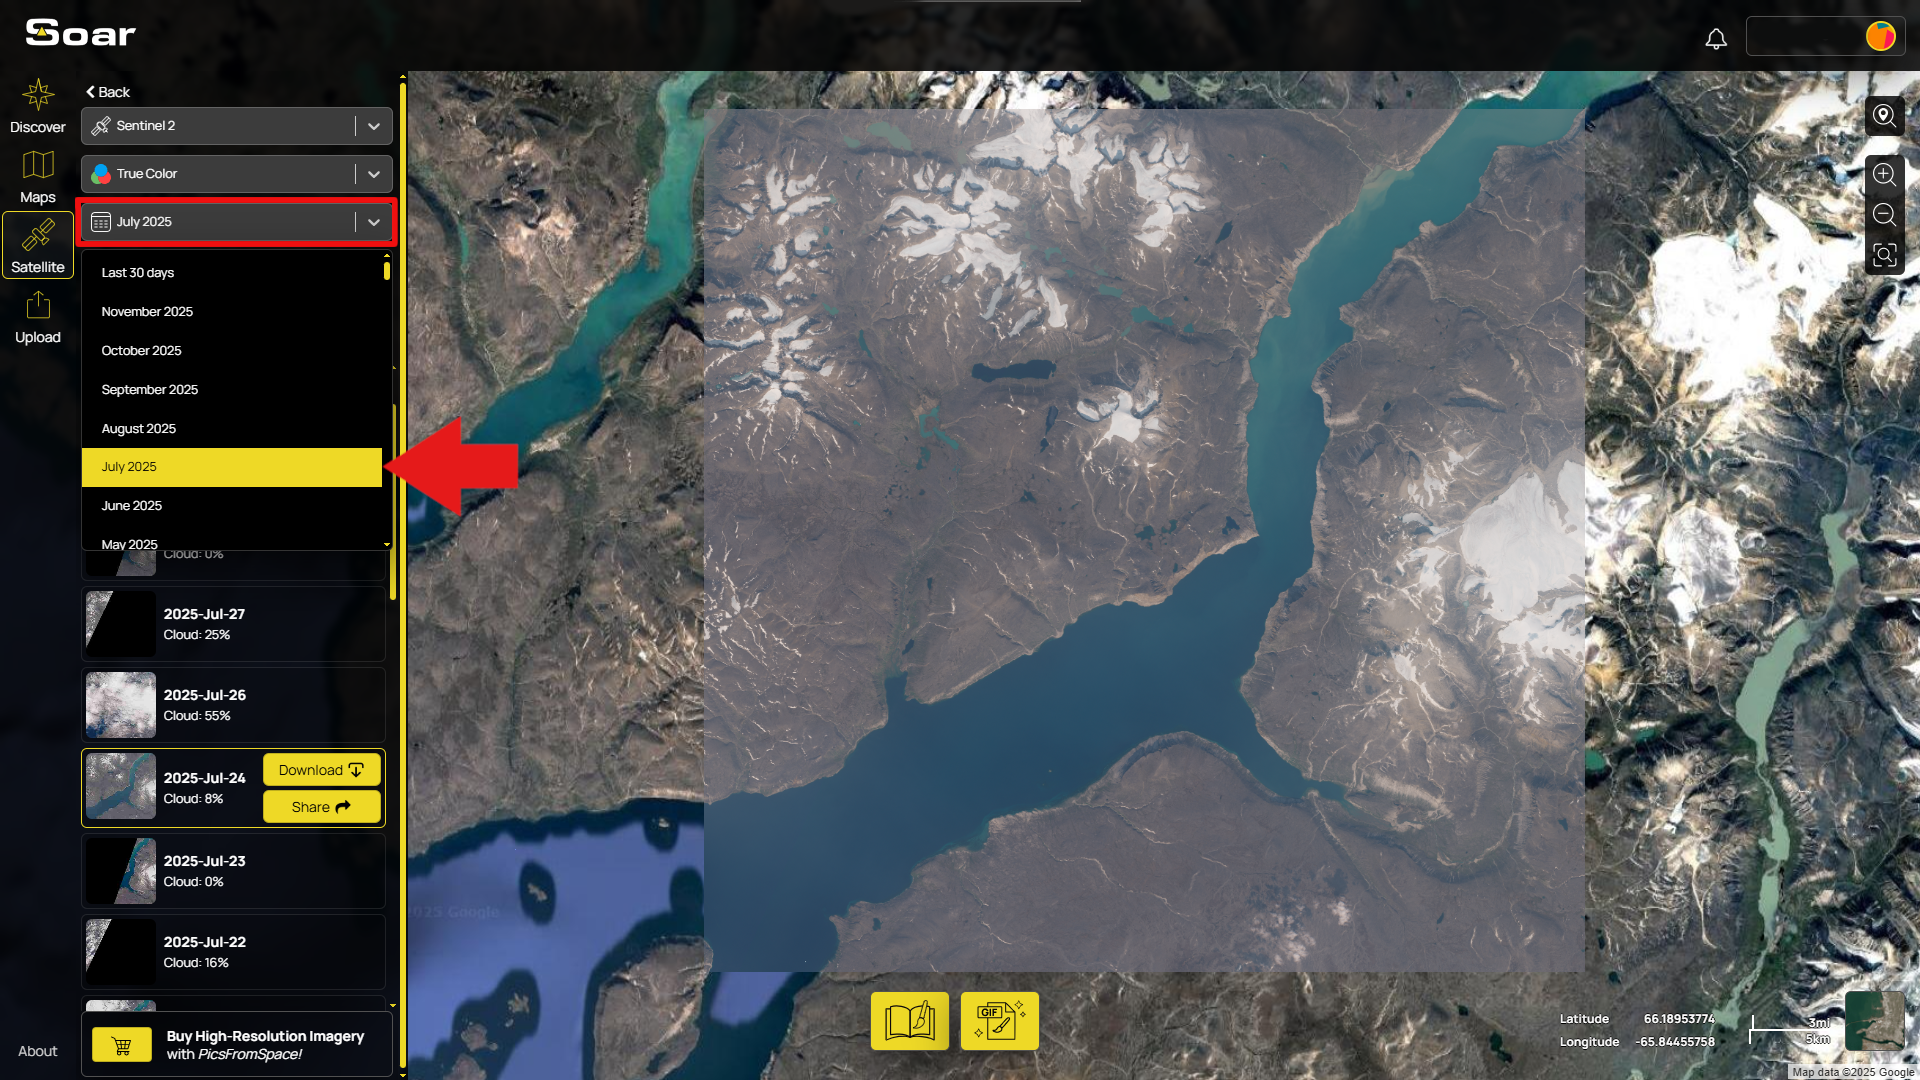
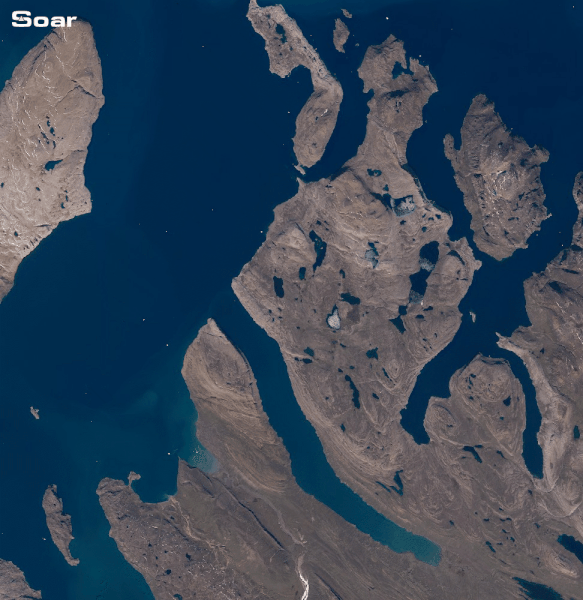
Once your box is drawn, Soar starts pulling in available captures from the satellite. On the left side of your screen, you’ll see a list of dates when the satellite passed over that spot. The most recent capture can be as new as the same day, or just a few days old. Here, our best capture of Baffin Island is from November 3rd 2025. We can see compared to the satellite basemap underneith, the area now looks quite different, currently covered in snow.
But here’s the cool part, you can scroll back through time to see how things looked months or even years ago (usually as far back as 2015). Just hit the date drop down menu and select the period you want to view. If we head back to July, we can see the landscape in a warmer period of time, transforming our image.
💡 Tip: Sometimes you might notice some dates with:
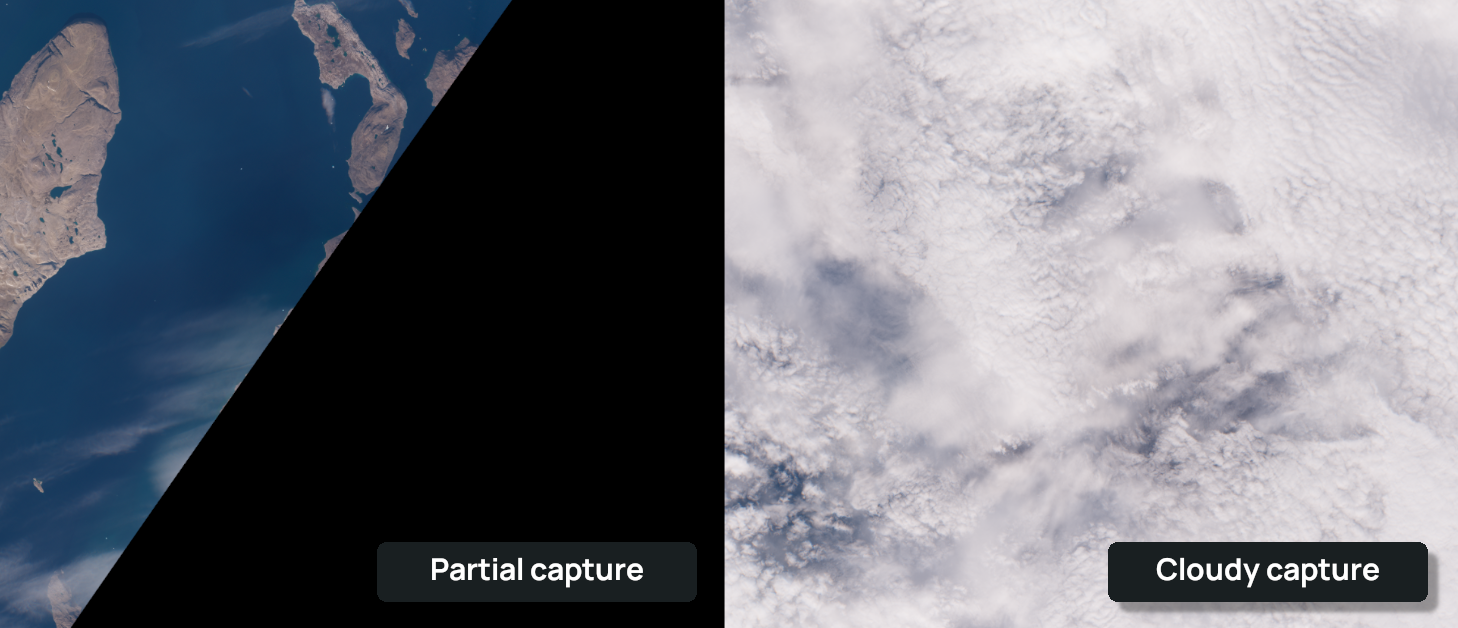
Experiment with different dates until you find a clean, clear image you like.
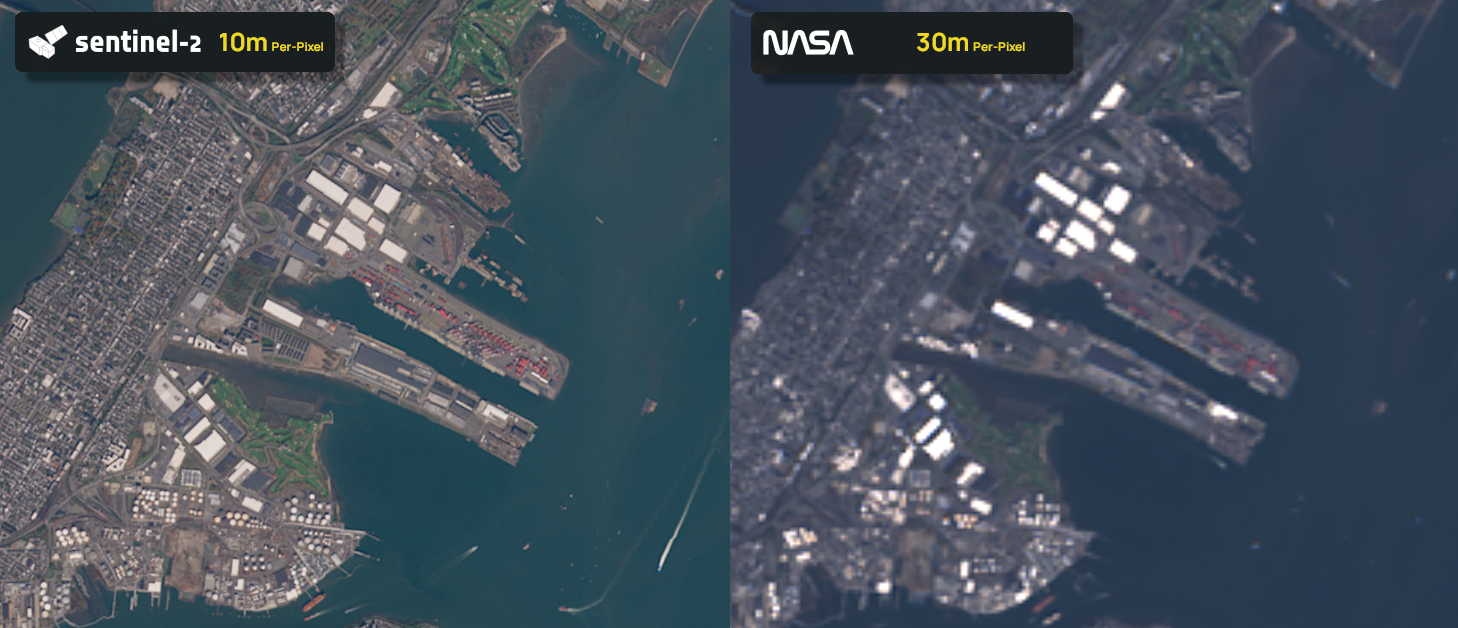
From the top dropdown, you might have noticed Soar uses two main satellites for its imagery: Sentinel 2 and NASA Landsat 8/9.
Most of the time you'll only need Sentinel (as is the default) but if you can't find a good capture for a specific date, switching to Landsat can be a handy option!
And there you have it! You now know how to make a satellite capture, for free, here on Soar! Simple, right? But there’s more you can do with these captures than just view them.
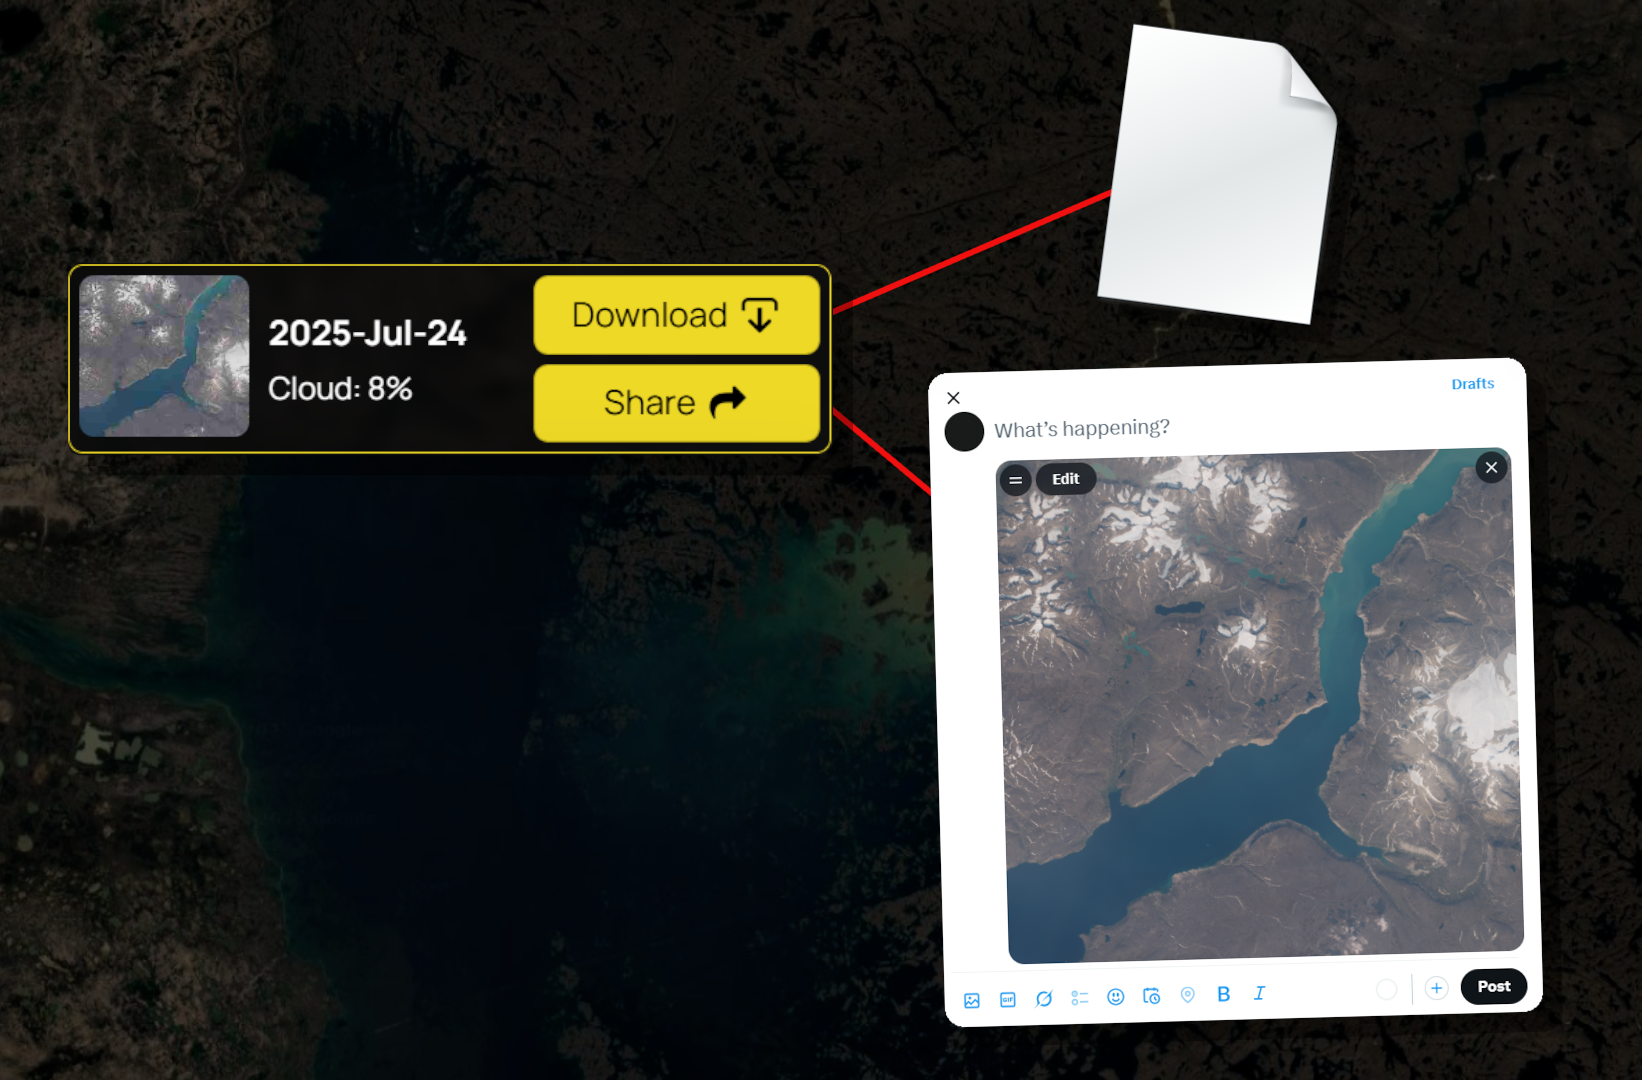
If you've found the perfect image, hit Download to save it to your device. From there, you can add it to a report or project, open it in other software, or even upload it back into Soar to share with the community. You can also share your capture just by sending a link, no download required! Simply copy and paste the link online, or hit the Share button for more social options.
If you want to see how an area changes over time, you can combine multiple captures into an animated GIF timelapse.
It’s surprisingly easy, and the results are stunning!
We’ve written a separate GIF Timelapse Guide that shows you how to bring these moments to life. Check it out and make something exciting.
Once you’ve created your image, you can annotate it to tell a story! Just click the yellow Create a Map button at the bottom of the screen, then use the available tools to draw, measure, add icons, text, and even images.
This tool is incredibly powerful. You can even create multiple slides in a presentation-style format to share your discoveries. Learn more about it in our Stoaries Tool Guide.
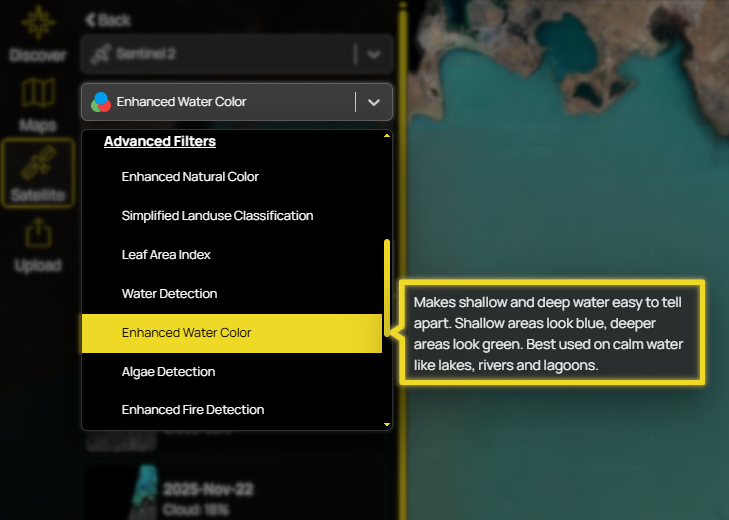
By default, Soar shows your captures in True Color, which looks just like what we’d see with our own eyes. But satellites collect so much more data than that. Try switching to different filters to reveal other details, like water, vegetation, or even temperature changes. You can do so by clicking the filters drop down.
Here are a few examples:
Water Detection - highlights rivers, lakes, and coastlines in a vibrant blue colour.
Vegetation Index - shows where plants are healthy or stressed in green.
Fire Detection - highlights areas with high heat in a vibrant glowing orange.
There are 19 filters in total, each one gives you a different way to look at your image. We’ve covered them all in our Satellite Filters Guide, if you want to explore deeper.
Lastly, while this option isn’t free, it’s still one of the most affordable ways to get higher-resolution imagery when you really need it. With a single click from your current map view, you can jump straight to Pics from Space using the button at the bottom of the page.
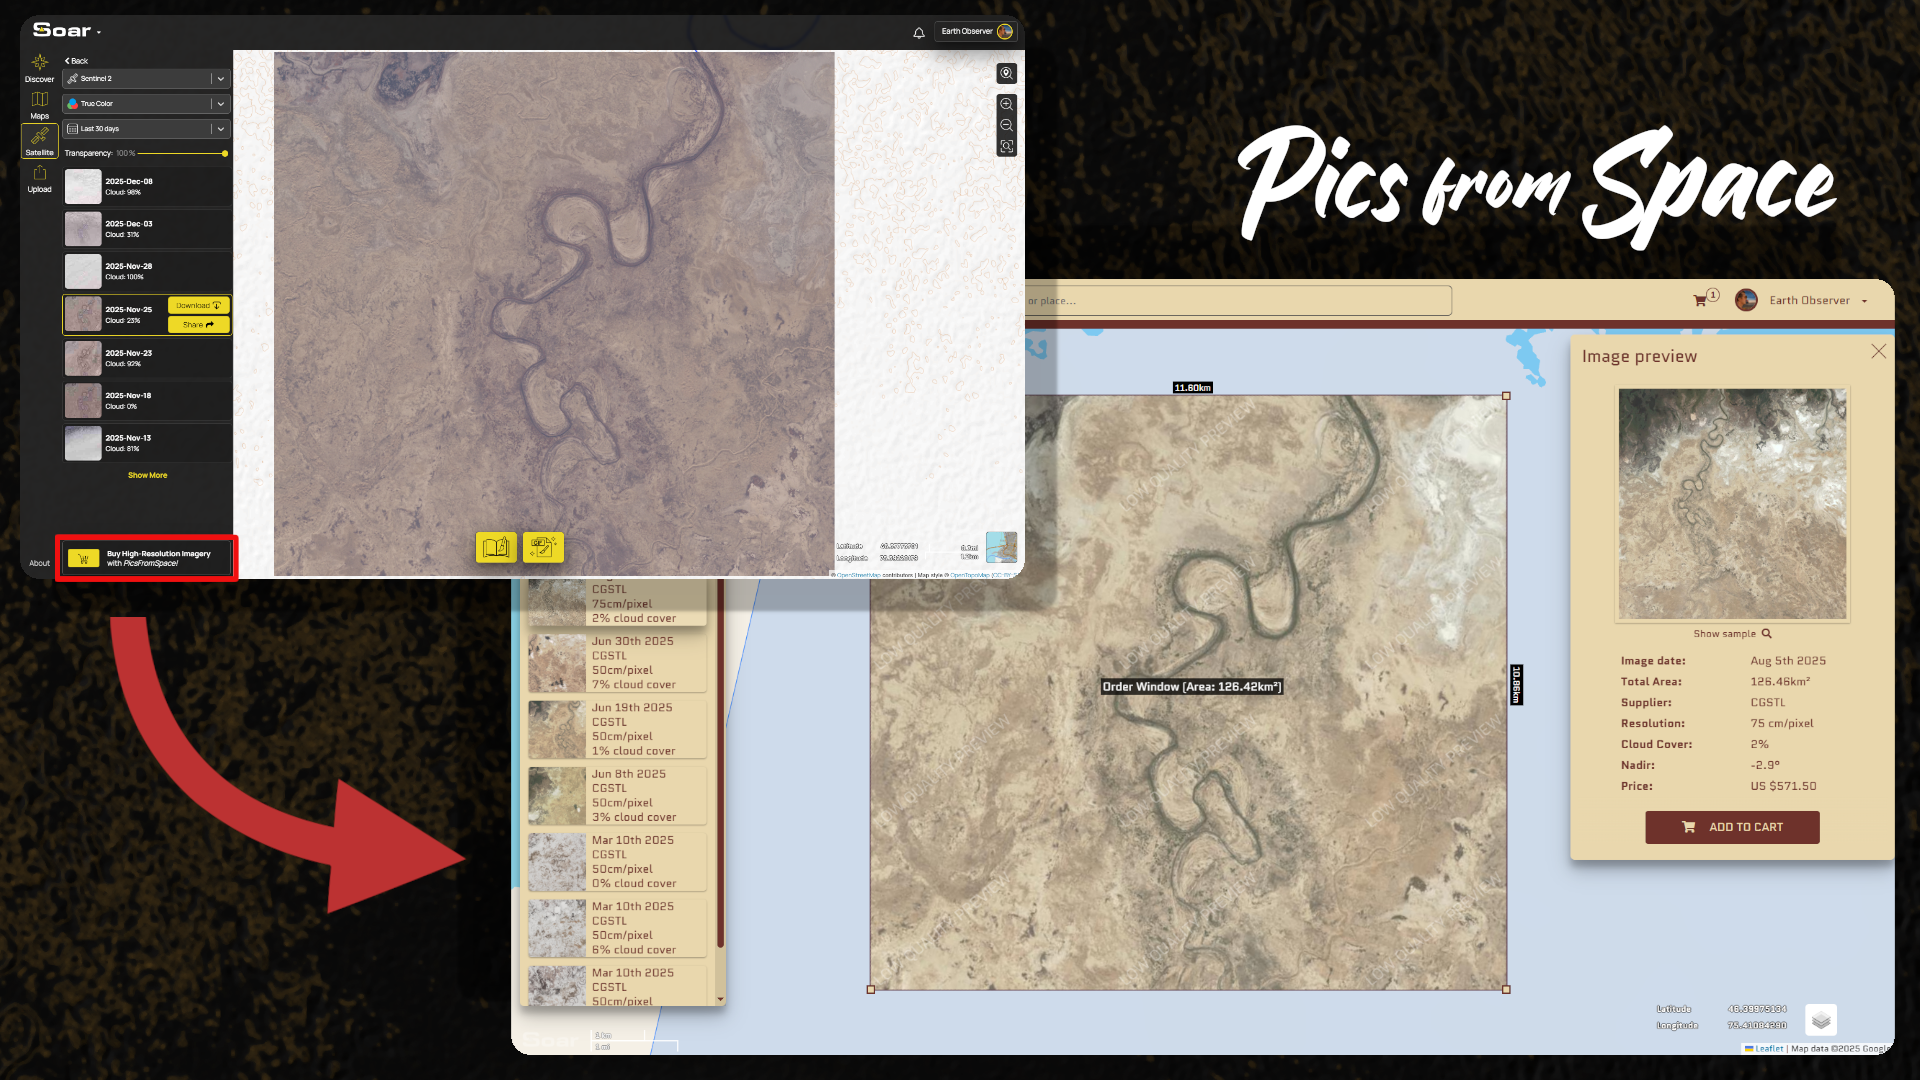
Pics from Space lets you browse and purchase archived high-resolution imagery, or even request a brand-new capture if what you need doesn’t already exist. You can learn more about Pics from Space here.
From your computer, you can explore almost any corner of the planet. Watch water levels drop, forests regrow, or cities expand - all from the eyes of satellites orbiting above.
Soar was built to make that possible for everyone. No expensive tools. No complicated software. So take a few minutes to explore, try a few filters, and if you find something fascinating, share it with us. We’d love to see what you discover.
Disclaimer: This blog (and its screenshots) reflect Soar version 6.6. The interface and functions may differ in newer versions.